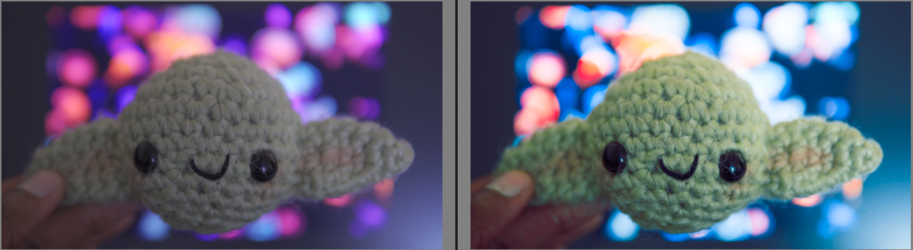
I stumbled across a video that introduced me to a very useful program that generates LUTs without being too complex or requiring the use of any paid programs. I've tested it with both Lightroom on pc since that's the most common photo editing app, but you can also do all the edits on your phone using the free Lightroom app. This should also be possible with most other photo editing apps made for photography. I will also preface this by saying that this is more ideal if you have a consistent setup with your room and lighting. I made a quick before and after just to showcase a little of what you can do with LUTs in OBS. This method is also used by some to colour grade videos, by taking frames from individual clips, as often an image editor like Lightroom is more intuitive for editing colours than most video editors.

1)
To start you need the LUT generator which can be downloaded from this site: https://sellfy.com/iwltbap/p/aq1y/. You can choose to pay any amount but you you can also put in $0 and download for free. Run the program and click the "Generate a HALD" button, and pick a folder to save it to. It will save a weird looking image in that location.


2)
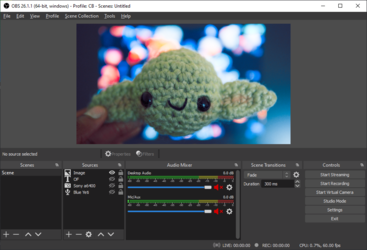
Next you want to take a screenshot of your camera feed in OBS and save it. You want to have your lighting setup how you normally would have them when streaming.

3)
On a computer:
Import the screenshot and the HALD (1st img you generated), then edit the screenshot to your liking but ONLY edit the colours/lighting. Right click on the image > settings > copy settings and in a similar fashion you paste those settings on the HALD image. Export that image, but make sure you choose the PNG file type from the export menu,
On a phone:
Send the HALD (1st img you generated), and the screenshot to your phone and import them both into Lightroom. Edit the screenshot however you like, but ONLY edit the Light/Color section. There should be a little menu in the top right corner where you can select "copy settings". Do that then open up the other image you imported to lightroom, and apply settings to that one. Save that image and send it back to your computer. I believe they are saved as jpegs so you gotta change it to a png file as well. Should be as simple as opening it in paint > save as > and choosing png as file type. For Mac I believe it's the preview app Preview app > open the file > choose File > Export, then choose the file type in the pop-up menu.
4)
Open back up the LUT Generator, this time pressing the second button, and locate image you just saved from the previous step. It will generate a .CUBE file which you can now use in OBS. To apply it in OBS right click your source > filters > click the "+" on the bottom left > apply Lut. Then you would click browse and locate that .CUBE file you just generate and it should apply the effect.

I apologize in advance if my guide is confusing lol.
1)
To start you need the LUT generator which can be downloaded from this site: https://sellfy.com/iwltbap/p/aq1y/. You can choose to pay any amount but you you can also put in $0 and download for free. Run the program and click the "Generate a HALD" button, and pick a folder to save it to. It will save a weird looking image in that location.
2)
Next you want to take a screenshot of your camera feed in OBS and save it. You want to have your lighting setup how you normally would have them when streaming.
3)
On a computer:
Import the screenshot and the HALD (1st img you generated), then edit the screenshot to your liking but ONLY edit the colours/lighting. Right click on the image > settings > copy settings and in a similar fashion you paste those settings on the HALD image. Export that image, but make sure you choose the PNG file type from the export menu,
On a phone:
Send the HALD (1st img you generated), and the screenshot to your phone and import them both into Lightroom. Edit the screenshot however you like, but ONLY edit the Light/Color section. There should be a little menu in the top right corner where you can select "copy settings". Do that then open up the other image you imported to lightroom, and apply settings to that one. Save that image and send it back to your computer. I believe they are saved as jpegs so you gotta change it to a png file as well. Should be as simple as opening it in paint > save as > and choosing png as file type. For Mac I believe it's the preview app Preview app > open the file > choose File > Export, then choose the file type in the pop-up menu.
4)
Open back up the LUT Generator, this time pressing the second button, and locate image you just saved from the previous step. It will generate a .CUBE file which you can now use in OBS. To apply it in OBS right click your source > filters > click the "+" on the bottom left > apply Lut. Then you would click browse and locate that .CUBE file you just generate and it should apply the effect.
I apologize in advance if my guide is confusing lol.